- Website builder
- Building pages
- The page builder
The page builder
Build any page from rows, columns and elements — add, move, copy, resize and style them, then save.
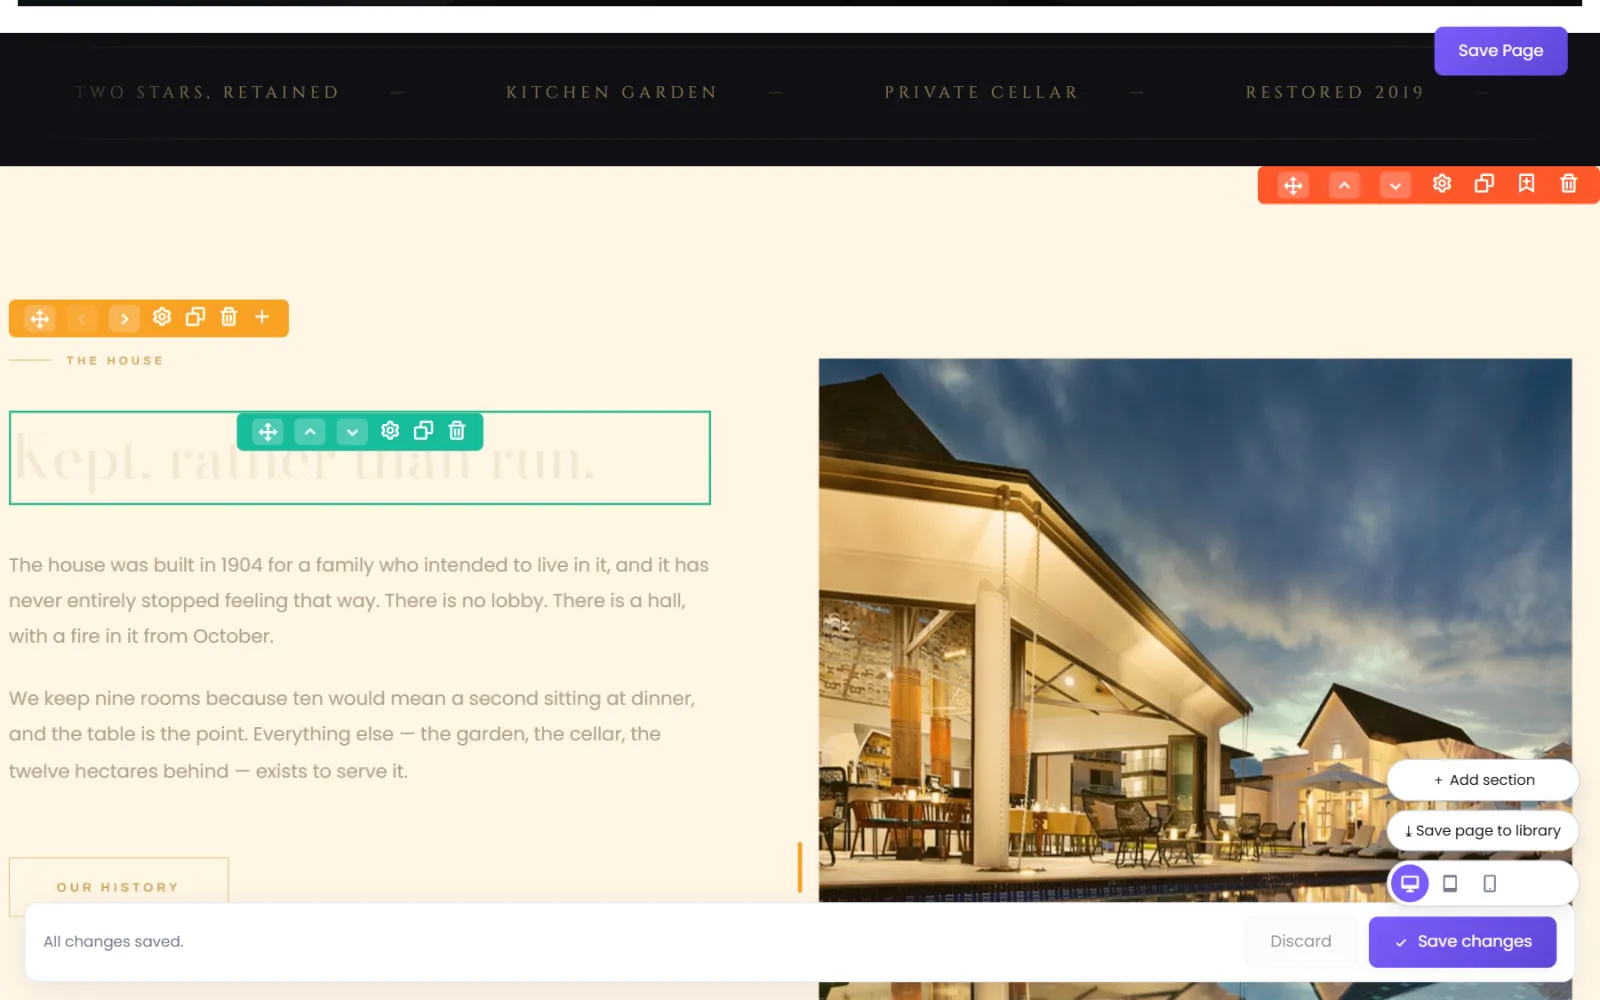
The page builder is where you design a page. Open it from Info Pages with the Builder icon on any page — it opens in a new tab, showing the page much as visitors will see it.
How a page is made: rows, columns, elements#
- A row is a horizontal band across the page — a hero, a strip of features, a contact section. Rows stack from top to bottom.
- Each row is split into columns — between one and six, side by side. On phones, columns stack one under another.
- Each column holds elements — a heading, some text, an image, a button, a gallery, a form… — stacked top to bottom.
So: page → rows → columns → elements. Each level has its own toolbar and its own settings.
The toolbars#
Hover over any part of the page to see its toolbar:
| Row (orange) | Column (yellow) | Element (teal) | |
|---|---|---|---|
| Move by dragging | ✓ (the ✥ handle) | ✓ | ✓ |
| Move one step | ▲ up / ▼ down | ◀ left / ▶ right | ▲ up / ▼ down |
| Settings (⚙) | Row settings | Column settings | Element settings |
| Copy | Duplicate the row | Duplicate the column | Duplicate the element |
| Delete (🗑) | ✓ | ✓ | ✓ |
| Extra | 🔖 Save this section to my library | ➕ add a column | — |
Add a row#
- Hover between two rows (or below the last one) and select the + that appears.
- Choose how many columns the row starts with — 1 to 6. The tiles show the split.
- The new row appears with empty columns, each showing a + to add an element.
You can add or remove columns later, and change their widths.
Add an element#
- Select the + inside a column.
- In Add an element, choose what to place: Heading, Text, Blurb, Button, Single Image, Single Video, Banners, Image Gallery, Video Gallery, Testimonials, Form, Blogs or Accordion.
- The element's settings open straight away — fill in its content and select Save changes.
What each element does, and its options, is in Elements.
Move things around#
- Drag a row, column or element by its move handle and drop it where you want it — even into another row or column.
- Or use the arrow buttons to move it one step at a time — handy on a laptop trackpad.
Resize columns#
Drag the handle between two columns to make one wider and the other narrower. In the phone preview the same handle sets the column's width on phones only.
You can also type an exact width — in Column settings, under Width.
Edit settings#
Select the ⚙ on a row, column or element to open its settings. Most settings windows have these tabs:
- Content (elements only) — what it shows: the words, the image, the gallery, the link.
- Design — spacing (padding and margin), width, the element's own look (fonts, colours, sizes), and the styling groups: backgrounds, borders, shadows, transforms, filters, animation and scroll effects. See Advanced styling.
- Advanced — visibility per screen size, CSS class and ID, and on rows, custom CSS and JavaScript.
At the top of the Design tab is the screen bar — Desktop, Tablet, Phone and Hover — which decides which screen size (or the mouse-over state) you are editing. See Tablet & phone.
Select Save changes at the bottom to apply them to the page.
Preview other screen sizes#
Use the three icons at the bottom of the builder — Desktop preview (full width), Tablet preview (820px) and Phone preview (390px) — to narrow the canvas and check how the page looks on smaller screens. Previewing changes nothing on the page.
Save the page#
Select Save Page (top right), Save changes in the bar along the bottom — they do the same thing — or press Ctrl + S (⌘ + S on a Mac). The bar says Unsaved changes until you do. Changes are live on your website as soon as the save completes — refresh your site's tab to see them.
Library tools#
At the bottom of the builder:
- + Add section — browse ready-made sections from the NijeesWeb library and your own saved sections, and add one to the bottom of the page.
- ⤓ Save page to library — save the whole page to My Library, so a new page can start from it.
More in Save and reuse sections.
Undoing a mistake#
There is no undo button. If you delete something by accident, leave without saving (choose Yes, leave when asked) and reopen the builder — the page is exactly as it was at your last save.
Was this page helpful?
Something is missing — tell us