- Online store builder
- Getting started
- Set up your store
Set up your store
Fill in the set-up page — store ID, store domain and the store's admin login — before you pay.
After you choose a plan, the Set up your store page asks for the few details needed to create your store. The store ID and domain cannot be changed by you after paying, so take a moment over them.
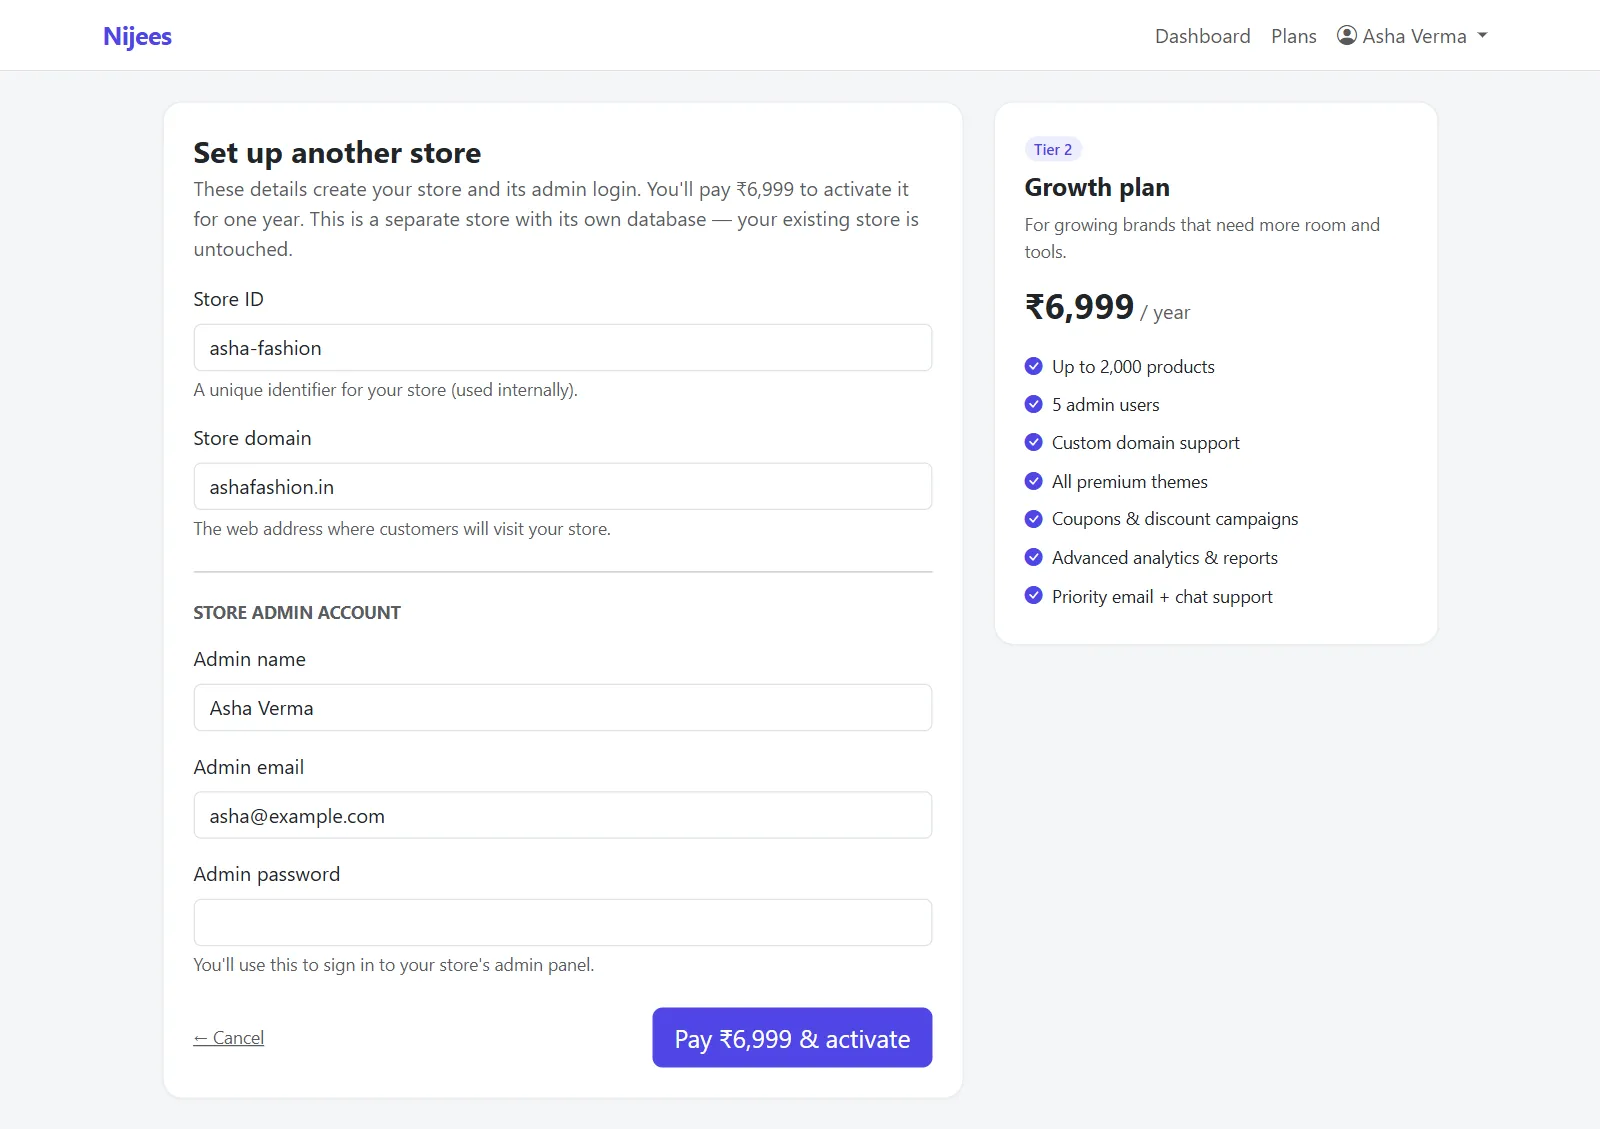
Store ID#
A short internal name for your store, such as asha-fashion. Shoppers never see it; it identifies your store in our systems and when you talk to support.
- Use only letters, numbers, dots (.), dashes (-) and underscores (_) — no spaces.
- It must be unique across the platform, so a generic word like
shopis probably taken.
Store domain#
The address customers will type to reach your shop. You have two choices:
- Your own domain, such as
ashafashion.in. You must already own it — buy it from any domain registrar first. - A free address on nijees.in, such as
ashafashion.nijees.in. It works the moment your store is created, with no DNS changes. You can move to your own domain later with support's help.
Type the bare address: no http://, no https://, no www. and no slash at the end. A www. version is added for you automatically — your store opens at www.ashafashion.in, and the address without www. forwards to it.
Store admin account#
This is the login for your store's admin panel — where you add products and handle orders. It is separate from your store account.
- Admin name — shown in the admin panel. Pre-filled with your account name.
- Admin email — you sign in to your store with this. Pre-filled with your account email; change it if someone else will run the store.
- Admin password — at least 6 characters. You type it once, so type it carefully.
Pay and activate#
Check the plan summary on the right, then select Pay ₹… & activate. You are taken to PhonePe's secure checkout — see Pay for your plan.
If this is not your first store, the page is called Set up another store and reminds you that the new store has its own database — your existing stores are untouched.
What your new store contains#
Every new store is created from the same starter store, so you can see how everything fits together:
- about ten sample fashion products in Men and Women categories, with sizes, prices and photos;
- a Home and an About page, a header, menus and a footer;
- sample tax rates, shipping weight slabs, a few delivery pincodes and a coupon;
- no payment methods — you add the ones you want before your first sale.
Edit or delete any of it. The launch checklist walks through what to replace.
If the form shows an error#
| Message | Fix |
|---|---|
| The store ID format is invalid. | Remove spaces and symbols other than ., - and _. |
| The store ID has already been taken. | Someone already uses that ID — add something unique, like your city. |
| The domain has already been taken. | That domain already belongs to a store on the platform. If it is yours, renew or upgrade it from your dashboard instead. |
| The www. alias for this domain is already taken. | The www. version of the domain is in use by another store. Contact support. |
| The password must be at least 6 characters. | Choose a longer admin password. |
| You've reached your limit of … stores | Your account's store allowance is used up — contact support to raise it. |
All of these are explained in Set-up form errors.
Was this page helpful?
Something is missing — tell us