- Online store builder
- Payments
- Razorpay
Accept payments with Razorpay
Connect Razorpay — find your Key ID and Key Secret, add the webhook, test with test keys, then go live.
Razorpay is the most widely used payment gateway in India: cards, UPI, net banking and wallets in one checkout. It settles in INR and 16 other currencies, and refunds can be issued from your store's admin.
What you need#
- A Razorpay account at razorpay.com. You can use test keys straight away; live keys come once Razorpay has activated your account (they check your business details and your store's policy pages).
- Your store's policy pages — privacy, terms, shipping, returns and refunds, and contact. Razorpay asks for them during activation.
1. Get your keys#
- In the Razorpay Dashboard, switch to Test Mode (top of the screen).
- Go to Account & Settings → API Keys and select Generate Key.
- Copy the Key ID (it starts with
rzp_test_) and the Key Secret. The secret is shown only once — keep it somewhere safe.
2. Add Razorpay to your store#
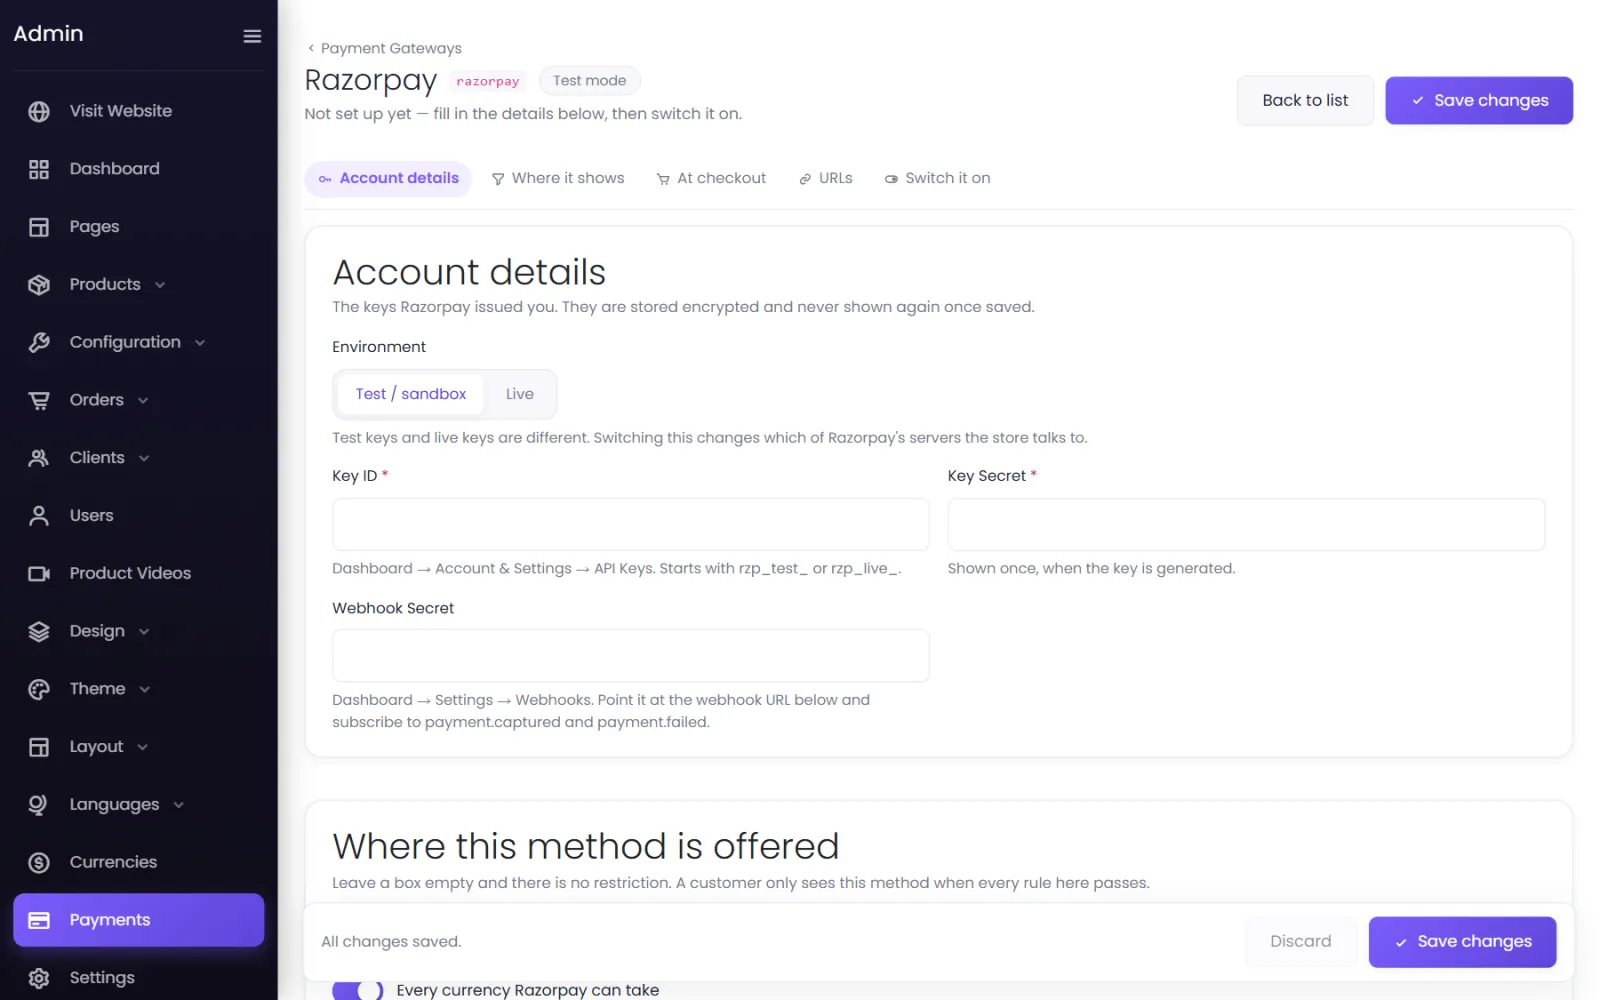
- In your admin, go to Payments → Add gateway → Razorpay. Its settings open.
- Set Environment to Test / sandbox.
- Paste the Key ID and Key Secret.
- Select Save changes.
3. Add the webhook (recommended)#
The webhook tells your store about payments even if the customer closes the window before returning — so no paid order is left Pending.
- In your admin, on the Razorpay method, find URLs for Razorpay's dashboard and Copy the Webhook / callback URL.
- In the Razorpay Dashboard, go to Settings → Webhooks → Add New Webhook.
- Paste the URL, type a secret of your choice, and tick the events payment.captured and payment.failed.
- Save. Back in your admin, paste the same secret into Webhook Secret and Save changes.
4. Test it#
Set Switch it on to Admins only, sign in to your store as an admin, and pay for an order with one of Razorpay's test cards or test UPI IDs. Check that the order turns Confirmed and Paid. See Test before going live.
5. Go live#
- Once Razorpay has activated your account, switch the Dashboard to Live Mode and generate live keys (
rzp_live_…). - Add a webhook in Live Mode too — test and live webhooks are separate.
- In your admin, set Environment to Live, paste the live Key ID, Key Secret and webhook secret, and set Switch it on to Live.
Refunds#
Refunds on Razorpay orders can be sent back to the customer's original payment method from your admin when you process a cancellation or return. See Refunds and store credit.
Problems#
- Payments fail with an authentication error — the Key ID and Key Secret do not match, or test keys are used with Environment: Live (or the other way round).
- Paid orders stay Pending — the customer closed the window before returning and no webhook is set. Add the webhook as above.
More in Payment gateway errors.
Was this page helpful?
Something is missing — tell us